Rest of Game (With Advance Info)
This is a decent enough guide for now to get started. In the future, I might create videos to add to this guide and write more in the descriptions and add annotation commentary to videos that don't have them. This video includes annotation commentary.
Here’s the Gex 3 Forum on www.speedrun.com
http://www.speedrun.com/gex3/forum
Here is a pastebin that lists version differences of the game.
http://pastebin.com/WuBLTB0d
Here is a link where it explains the movement in Gex 2/3.
http://gexruns.wikia.com/wiki/Movement_%28Gex_2_and_3%29
Walking in Water
https://www.youtube.com/watch?v=p1I5BCdLP8U
Wrong Warping to Mission Control
https://www.youtube.com/watch?v=tDXOklvWcoA
Little bit Faster Spawn
https://www.youtube.com/watch?v=hWpJYiwN_ko
Pausing the game can create more lag for jumps to be longer. More lag in general also makes jumps longer. When you jump over a slope that will make Gex fall, tailwhipping can make Gex not fall down the slope. You can control how high Gex initially jumps by various lengths of holding down the X button.
Be aware that the game takes longer to load at the start when it plays the cutscene that is at the beginning of the game. This might be caused by activating any level’s cutscene with Agent Xtra and/or creating a new game the first time. Without having the cutscene, the game loads faster so simply create a new game that will play the cutscene and then create another new game on top of the new game that you just created that will not play the cutscene.
Checking at the end of levels to make sure you got everything is a good idea if you are not sure. At the end of game when entering Channel Z, you should have 49 remotes, 45 bonus coins, and 50 pawprints when you pause the game. Be warned though: If you complete the bossfight with missing collectables, then that sucks because the game doesn’t save when you beat the final bossfight, resulting in you loosing everything from your last save to the end.
Using the Debug Menu is great for practice. Here’s the cheat code.
Pause the game then hold R2 while entering: Up, Circle, Right, Up, Left, Right, Down. When you hear a sound, go back to the game and press the select button to view it. You can’t press the start button to pause the game anymore while using this. You also have infinite hit points.
Here are splits from my 2:13:50 run if you want to see splits for this category. “Worst Level” is Holy Moses, “All Those Western Resets” is Western Station, “NIGHTMARE TV” is Mythology Network, and “Glitch TV” is Gangster TV.
https://imgur.com/a/I3hum
Mission Control 00:09
Lake Flaccid 03:03
Slappy Valley 10:05
Funky Town 15:20
Kangeroo Bonus TV 21:29
Snowboarding Bonus TV 22:17
Tank Bonus TV 22:55
Donkey Bonus TV 24:17
Crocodile Bonus TV 25:02
Secret TV 1 26:20
Secret TV 2 27:40
Secret TV 3 29:05
Secret TV 4 30:56
Bossfight TV 1 32:22
Bossfight TV 2 32:42
Bossfight TV 3 34:15
Rez Bossfight 36:04
Annotation Commentary Text
Welcome to the final video of this guide.
00:00 to 00:10
First of all, we will watch the main hub routes, then the bonus levels, then the secret levels, and finally the bossfight levels. At the bottom of the description, I list all of these with times so that you can skip to that part.
00:10 to 00:24
All video clips besides the Akuji secret TV level are part of my 2:25:47 run btw.
00:24 to 00:35
Hold down the Triangle button to look at the picture and with momentum, jump on top of the chair and glide across to the pawprint.
00:58 to 01:10
For this OOB, keep on trying to jump on the camera and once you got a jump off, glide to the left of the camera and keep on gliding against the wall. Once OOB, line yourself up with the Lake Flaccid door and keep on going straight.
01:18.4 to 01:40
Then at least stop gliding for a few seconds while still holding down forward in this part.
01:41 to 01:50
You can control when Alfred starts by simply having him onscreen.
03:45 to 03:55
For this pawprint, I first hold X and then down.
04:00 to 04:05
Be careful not to collect any fly coins when Gex is nearly off screen in this part. Maxing out the camera here would help.
04:58 to 05:08
To make it up, go back for a moment then go forward.
05:27 to 05:35
Tailbounce on the part of the cart that is nearest to the wooden door to make this jump.
06:15 to 06:20
Karate kicking these sand castles is a fast way to destroy them.
08:35 to 08:45
Collecting this pawprint is a pain. First I go off to the side and then I walk to the bridge and fall off with some momentum for Gex to move to the pawprint in midair. Then I time it just right to hit the pawprint with a tailwhip.
09:19 to 09:34
If you fail this jump then a quick way to get back up is to bounce on the corner of the pillar off to the right that is near the high ground back to the higher ground.
12:25 to 12:36
To make the moving box crate start, look at it with the camera.
15:52 to 16:02
You can make this early cycle with the moving platform if you hit the 2 pigeons fast enough.
16:08 to 16:18
You can get the truck’s fly coins in this go but it’s risky since you must catch this cycle with the moving platform.
16:50 to 17:00
There is this way if you have collected the truck’s fly coins already that you can actually use this power up only 2 times to collect what I collect on the other side instead of 3 times but it requires really precise movement.
17:36 to 17:53
Do not skip the cutscene until the gates break or else the gates won’t actually break.
17:53 to 17:59
This moving platform resets its position when you get out of the sewer.
20:40 to 20:50
Spamming X at the beginning is one way to hit the first elf right away.
22:18 to 22:24
Reminder: To kill the snowboarding elves fast, first you hit them and then you wait until they are out of their animation of being hit then you hit them again.
22:24 to 22:34
Hitting while having momentum also helps hitting the elves.
22:34 to 22:40
Hitting the elves in the front could help too since the elves go in that direction always.
22:40 to 22:50
You can reset their position by having them offscreen.
23:00 to 23:10
So by resetting the filth one, have the enemy offscreen.
23:14 to 23:20
I have the moving ground platforms offscreen so they won't start too early.
23:30 to 23:40
You can destroy the mines by hitting them.
25:40 to 25:50
A TAS would use the firefly.
27:45 to 27:53
You can shoot past the webs in this area when you go near them and shoot.
27:57 to 28:07
I play with the camera being as close to Gex as possible in this level.
29:10 to 29:20
Just like the croc bonus level, you can destroy the mines by hitting them.
29:20 to 29:28
To be on the safe side, go down as much as you can before entering the loading zone or else there is a chance you will miss the trigger zone.
30:15 to 30:28
Stay down, swim across, and swim up just like me or else the camera will get stuck.
30:28 to 30:37
Try to be near the shadow of this boss at the beginning of his attacks.
32:23 to 32:33
I turn the camera for a second to reset the static that goes around the small circle area.
34:33 to 34:43
You jump towards the outer shell of the space capsule to skip the cutscene.
35:32 to 35:40
DO NOT karate kick into the doorway that leads to the bossfight or else the game will freeze.
35:48 to 35:58
If you tailbounce on any fly TVs here, they will get right back up.
36:03 to 36:09
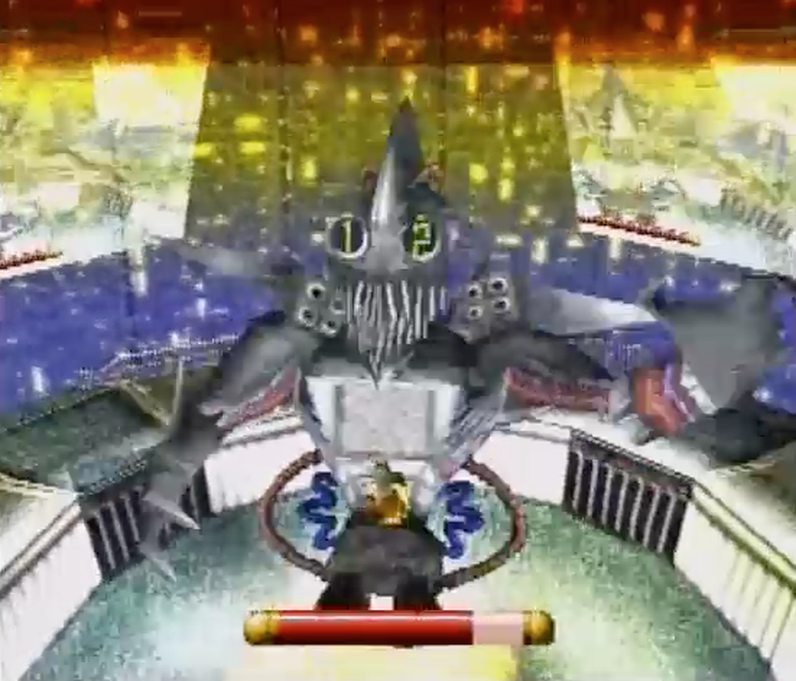
There are MANY ways to complete this bossfight. Here is one of my ways…
36:09 to 36:14
Line Gex up 2 poles in from the edge of any ramp. When Rez’s shoulders go up, move to the edge and jump away from Rez for a moment then move forwards Rez.
36:14 to 36:25
This is to get in range of the trigger for Rez to open the target.
36:25 to 36:35
Tailbounce this time on the TV and follow what I did here.
36:40 to 36:48
Then do the same exact things that you did earlier on in the bossfight.
36:55 to 37:05
When Rez is exploding, look away from him to reduce the lag that is happening by a ton.
37:10 to 37:18
There is this other way that is faster to defeat Rez but it requires a risky jump. Click here to watch it.
37:21 to 37:28
And that’s that. Hopefully this guide will encourage some of you to run this category and helps you in levels like Mythology Network and Gangster TV. Thanks for watching! :D
38:12 to 38:28
00:00 to 00:10
First of all, we will watch the main hub routes, then the bonus levels, then the secret levels, and finally the bossfight levels. At the bottom of the description, I list all of these with times so that you can skip to that part.
00:10 to 00:24
All video clips besides the Akuji secret TV level are part of my 2:25:47 run btw.
00:24 to 00:35
Hold down the Triangle button to look at the picture and with momentum, jump on top of the chair and glide across to the pawprint.
00:58 to 01:10
For this OOB, keep on trying to jump on the camera and once you got a jump off, glide to the left of the camera and keep on gliding against the wall. Once OOB, line yourself up with the Lake Flaccid door and keep on going straight.
01:18.4 to 01:40
Then at least stop gliding for a few seconds while still holding down forward in this part.
01:41 to 01:50
You can control when Alfred starts by simply having him onscreen.
03:45 to 03:55
For this pawprint, I first hold X and then down.
04:00 to 04:05
Be careful not to collect any fly coins when Gex is nearly off screen in this part. Maxing out the camera here would help.
04:58 to 05:08
To make it up, go back for a moment then go forward.
05:27 to 05:35
Tailbounce on the part of the cart that is nearest to the wooden door to make this jump.
06:15 to 06:20
Karate kicking these sand castles is a fast way to destroy them.
08:35 to 08:45
Collecting this pawprint is a pain. First I go off to the side and then I walk to the bridge and fall off with some momentum for Gex to move to the pawprint in midair. Then I time it just right to hit the pawprint with a tailwhip.
09:19 to 09:34
If you fail this jump then a quick way to get back up is to bounce on the corner of the pillar off to the right that is near the high ground back to the higher ground.
12:25 to 12:36
To make the moving box crate start, look at it with the camera.
15:52 to 16:02
You can make this early cycle with the moving platform if you hit the 2 pigeons fast enough.
16:08 to 16:18
You can get the truck’s fly coins in this go but it’s risky since you must catch this cycle with the moving platform.
16:50 to 17:00
There is this way if you have collected the truck’s fly coins already that you can actually use this power up only 2 times to collect what I collect on the other side instead of 3 times but it requires really precise movement.
17:36 to 17:53
Do not skip the cutscene until the gates break or else the gates won’t actually break.
17:53 to 17:59
This moving platform resets its position when you get out of the sewer.
20:40 to 20:50
Spamming X at the beginning is one way to hit the first elf right away.
22:18 to 22:24
Reminder: To kill the snowboarding elves fast, first you hit them and then you wait until they are out of their animation of being hit then you hit them again.
22:24 to 22:34
Hitting while having momentum also helps hitting the elves.
22:34 to 22:40
Hitting the elves in the front could help too since the elves go in that direction always.
22:40 to 22:50
You can reset their position by having them offscreen.
23:00 to 23:10
So by resetting the filth one, have the enemy offscreen.
23:14 to 23:20
I have the moving ground platforms offscreen so they won't start too early.
23:30 to 23:40
You can destroy the mines by hitting them.
25:40 to 25:50
A TAS would use the firefly.
27:45 to 27:53
You can shoot past the webs in this area when you go near them and shoot.
27:57 to 28:07
I play with the camera being as close to Gex as possible in this level.
29:10 to 29:20
Just like the croc bonus level, you can destroy the mines by hitting them.
29:20 to 29:28
To be on the safe side, go down as much as you can before entering the loading zone or else there is a chance you will miss the trigger zone.
30:15 to 30:28
Stay down, swim across, and swim up just like me or else the camera will get stuck.
30:28 to 30:37
Try to be near the shadow of this boss at the beginning of his attacks.
32:23 to 32:33
I turn the camera for a second to reset the static that goes around the small circle area.
34:33 to 34:43
You jump towards the outer shell of the space capsule to skip the cutscene.
35:32 to 35:40
DO NOT karate kick into the doorway that leads to the bossfight or else the game will freeze.
35:48 to 35:58
If you tailbounce on any fly TVs here, they will get right back up.
36:03 to 36:09
There are MANY ways to complete this bossfight. Here is one of my ways…
36:09 to 36:14
Line Gex up 2 poles in from the edge of any ramp. When Rez’s shoulders go up, move to the edge and jump away from Rez for a moment then move forwards Rez.
36:14 to 36:25
This is to get in range of the trigger for Rez to open the target.
36:25 to 36:35
Tailbounce this time on the TV and follow what I did here.
36:40 to 36:48
Then do the same exact things that you did earlier on in the bossfight.
36:55 to 37:05
When Rez is exploding, look away from him to reduce the lag that is happening by a ton.
37:10 to 37:18
There is this other way that is faster to defeat Rez but it requires a risky jump. Click here to watch it.
37:21 to 37:28
And that’s that. Hopefully this guide will encourage some of you to run this category and helps you in levels like Mythology Network and Gangster TV. Thanks for watching! :D
38:12 to 38:28